hexo-learn
资料查询
首先先了解到了可以使用的博客有hexo、hugo、astro、wordpress、typecho。
这里我选择使用hexo和github来构建我的博客,本次参考了以下内容
https://www.xmdblog.com/posts/70db7d7c.html
准备工作
需要准备的主要有Node,git,一个github账号
Node下载
git下载
hexo安装
在Git Bash运行
1 | npm install -g hexo-cli |
检查安装情况
1 | node -v |
GitHub部署
先创建一个私密仓库名称格式:<Github 用户名>.github.io
Git Bash运行
1 | git config --global user.name <用户名> |
建议用户名和邮箱和Github上的统一
再运行以下代码检查是否配置成功
1 | git config -l |
连接Github
运行一下命令来获得ssh秘钥
1 | ssh-keygen -t rsa -C <邮箱> |
在github上输入ssh秘钥
Github连接测试
1 | ssh -T git@github.com |
新建一个博客
hexo init myBlog
cd myBlog
npm install
博客主题
寻找主题的网站:
https://hexo.io/themes/
图片转化svg:
https://www.autotracer.org/
先下载下来自己想要的主题文件,解压到themes文件夹内,在config.yml文件中修改theme:
修改完后执行
1 | hexo g |
主题下的个人配置:
Header 主页面标题
favicon 图标
avatar 个人头像图片
输出新文章:hexo new ‘’
有关md文件
hexo会默认打开一个设置导致md文件的使用情况发生一些变化,在config.yml文件下将marked的breaks设置为false即可解决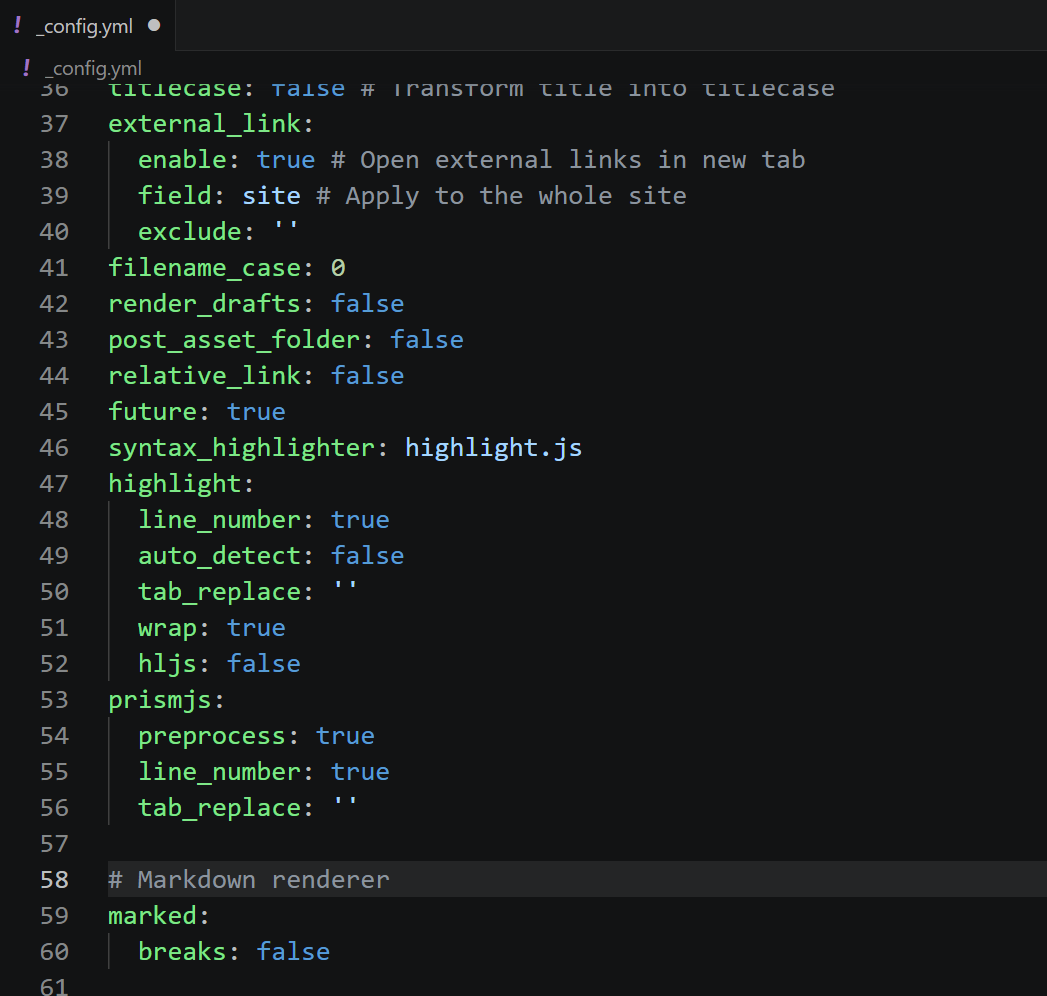
1 | marked: |
图片插入
博客的图片建议放在和博客md文件同文件夹下的/images文件中
可使用以下格式来索引图片
1 |  |
新建文章
1 | hexo new '文章名称' |
删除文章
可以先删掉本地的md文件,清除残留缓存,再部署到自己的网站上
1 | hexo cl;hexo g;hexo d |
- Title: hexo-learn
- Author: hap
- Created at : 2026-03-30 18:58:27
- Updated at : 2026-04-06 01:10:12
- Link: https://redefine.ohevan.com/2026/03/30/hexo-learn/
- License: This work is licensed under CC BY-NC-SA 4.0.
Comments